Create a Firewall Access Request Ticket
-
Open two web browsers – one for ServiceNow and one for Policy Planner – as you will be going back and forth between the applications to complete the ticket review process.
-
Log in to each application.
-
In ServiceNow, navigate to Self-Service > Service Catalog.
-
In the Search catalog dialog box, enter Firewall Access Request.
-
After the initial search, Firewall Access Request will be listed in the Top Requests section that can be clicked to begin a new ticket.
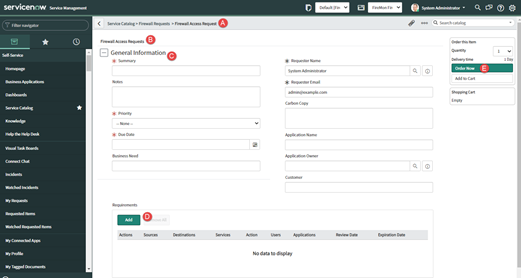
Click Firewall Access Request on the results page. This You can begin to create a new ticket.
Complete the required General Information fields (marked by a red asterisk).
Click Add to open the dialog box to add any requirements.
Click Order Now.
Step 3, a-e
An Order Status page will open. The new access request ticket is pending approval.
Click the Request Number.
On the Request page, you will approve the request. This additional step is to certify the validity of the request.
Scroll to the bottom of the page, click the Approvers tab.
Right click on an approvers name and select Approve.
You will see a confirmation message that the ticket was routed to Policy Planner.
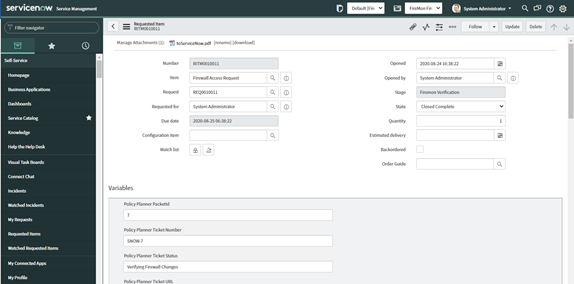
In the Requested Items tab, click the Request number (the RITM number) to open the Requested Item page for the ticket. Details about the Policy Planner ticket can be viewed in the Variables section.
-
In Policy Planner, the newly created access request ticket will be listed in All Tickets of the associated Policy Planner instance.
-
On the toolbar, click Tickets.
-
From the All Tickets list, click the new request ticket (it will show as SNOW-#). The ticket is in the Design task.
-
Assign the ticket and proceed as usual completing ticket requirements. In the General Information section, you can see the connected RITMs Parent REG Number.
-
Complete the ticket from the Design task.
-
On the toolbar, click Tickets.
-
The ticket is now in the Review task.
-
-
In ServiceNow, find the RITM item. Its Status is now Work in Progress with a Stage of Waiting for Security Review. An attachment has been added, and an approval of the design is requested.
-
Scroll to the bottom of the page, click the Approvers tab.
-
Right click on the approvers name and select Approve.
-
The ticket task is now Implementing Changes.
-
-
In Policy Planner, the ticket has moved to the Implement task and is assigned to the ServiceNow User who approved the review.
-
The ticket may need to be unassigned and reassigned to the correct user to complete the process. You can use all functionality of the Implement task, including Enforcement Windows, Commit, Run Selected and Manual edit of change statuses.
-
Once changes have been implemented, complete the ticket as usual in Policy Planner. The ticket will go through Auto Verify, Verify, and Rule Documentation steps as usual.
-
After the ticket is verified in Policy Planner, it will call back to ServiceNow to complete the REQ and RITM items.
-
-
In ServiceNow, the ticket has a task of FireMon Verification and a Status of Closed Complete.